How to Dual Booth your PC-Linux Ubuntu & Windows
Dual-Booting Windows XP/Vista And Ubuntu 7.04
In this tutorial I will teach you how to dual-boot between Windows XP/Vista and Ubuntu (i use this one in my pc-mas maganda kung ubuntu ang os).
This tutorial will be split up into two parts:
- Part one for people who have no operating system installed.
- Part two for people who have Windows XP/Vista installed and don't want to re-install Windows.
Part 1: Fresh start
In this part I will go though every step from installing Windows and Ubuntu to creating the dual-boot.
Windows XP + Ubuntu 7.04
What you will need:
- Windows XP Boot Disk
- Ubuntu 7.04 Boot Disk
Make sure your computer is set to boot from a CD.
To check this go into your BIOS. From there go to "Boot" and go to "Boot Priorities". Make sure CD-ROM is set to boot first and you're all set.
Installing Windows XP
Now I am going go over how to install Windows XP step-by-step.
1. Make sure your XP boot up disk is in the CD-ROM and start your PC.
2. A blue MS-DOS screen will load up first asking you if you want to install drivers or run an Automated System Recovery. Just wait for them to go by and then Windows will begin to load files needed to install XP.
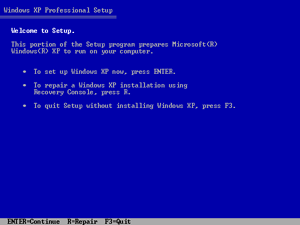
2. Now you will see a Welcome to Setup screen. From here just press Enter.
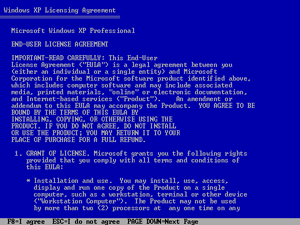
3. Agree to the license agreement by pressing F8.
4. Now to the important part of this installation. You will now see a screen where you will tell Windows XP to install itself. We aren't going to give XP the entire hard drive as we will be giving some to Ubuntu also. Press the C button on your keyboard to create a new partition.
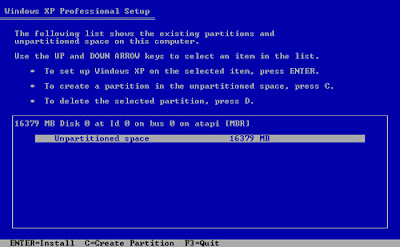
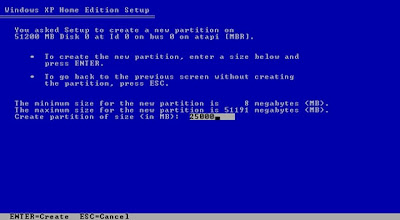
5. You will now see a screen in which you can edit the size of our new partition. Depending on your hard drive size and preference, determine the amount of gigabytes (GB) you are going to give XP to use. After you have chosen the size hit Enter to create the partition.
Note -
- Windows XP requires at least 1.5 gigabytes of hard drive space.
- 1000 megabytes (MB)= 1 gigabyte (GB). So when entering XP's partition make sure to write it as 90000 instead of 90, because it reads in megabytes, not gigabytes.
6. You will now be brought back to the screen in step 4. Highlight the new partition you created and press Enter to install.
7. The next screen will ask you how you would like to format the partition (FAT32 or NTFS). The choice is up to you and what you prefer. If you need help then check out this article FAT32 or NTFS: Making the Choice. Regardless of your choice, choose the quick option as this will make the installation go a whole lot quicker.
8. The last step before Windows installs itself onto your system. Just press F to begin formatting.
9. Now just wait...
10. After the installation has completed your system will reboot and now it is time to finish up installing Windows XP. This part should be pretty self-explanatory so I will let you complete it with your own choices.
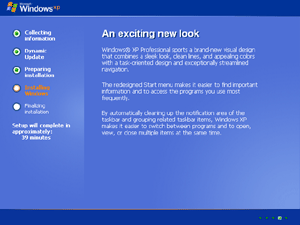
Congrats! You have fully installed Windows XP on your system. Activate windows if you want or do anything thing else to it. When ready go on to the next part to install Ubuntu and get the dual-boot up.
Installing Ubuntu 7.04 + Dual-Boot
Again make sure your computer is set to boot from CD-ROM.
1. Insert the Ubuntu 7.04 boot disk and start up your computer. The boot screen will come up next. Highlight the Start or install Ubuntu choice and press Enter. Be patient while the loader goes back and forth. This may take a few minutes.
2. After that Ubuntu will load up and you will be presented with a very bare screen. Double click on the Install icon to begin setting up Ubuntu.
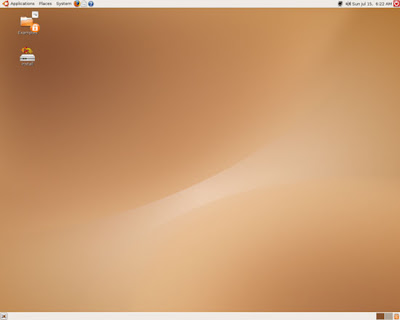
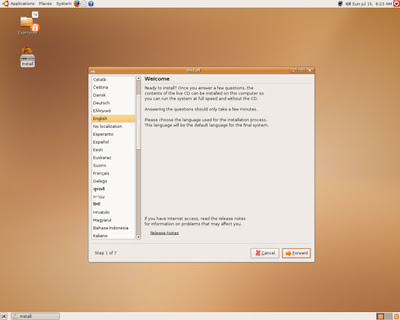
3. After you double-click on the install icon it will first ask you to pick your preferred language. Choose one and click Forward.
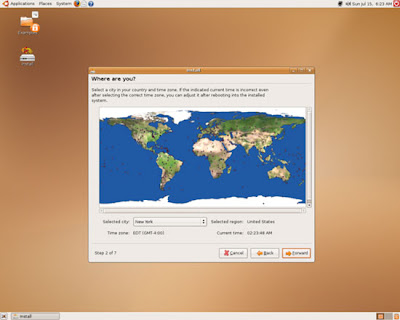
4. The next screen will ask you to pick a location near you for time purposes.
5. Now to choose your keyboard layout. Most commonly it is U.S English.
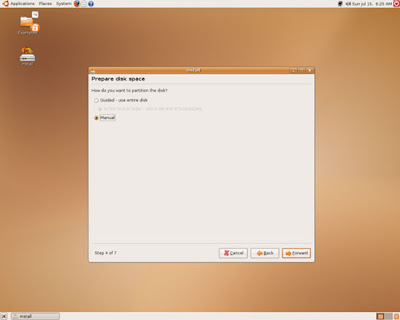
6. Once again it is time to partition your hard drive. From this screen make sure that Manual is checked and click Forward.
Now you should see a screen entitled Prepare partitions. We are now going to create the partition in which Ubuntu will run on plus a file called "SWAP" to act as virtual memory.
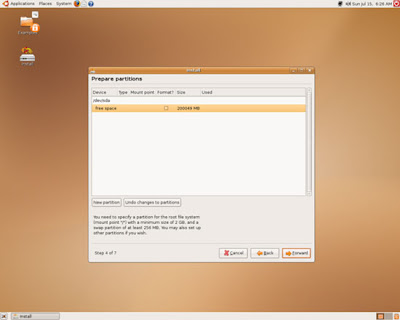
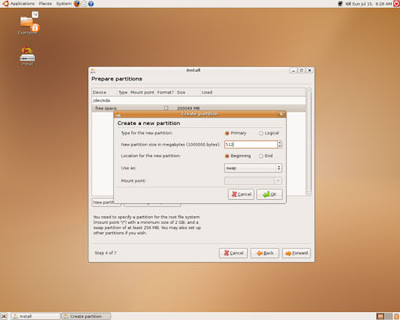
7. First let's create the SWAP file. Click on New partition. The SWAP file won't need a whole lot of space to run, so just give it 512 megabytes which will be more than enough for it to run. Now just change the Use as: option to SWAP while keeping the type of partition as Primary and the location as Beginning. Click OK to add it.
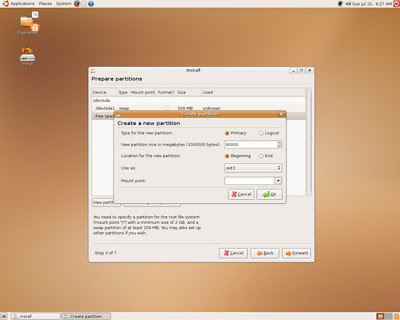
8. Now make sure free space is highlighted and click New partition again. This time we will add the hard drive space for Ubuntu to use. Give it what ever amount of space you would like depending on your hard drive space. Just remember to give it at least 2 GB though I recommend you give it much more. Now change the Use as: to ext3 and keep the rest of the settings the same. Click OK to add.
9. Next right-click on the partition ext3 and click edit. From here change the mount point to a forward slash / and click OK.
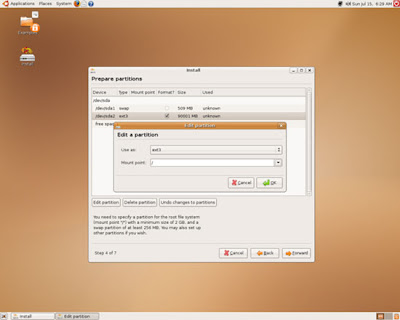
10. You should see a screen similar to this one, but with the partition NTFS on it. Last thing to do before proceeding is check the box next to ext3 to format and then click Forward.
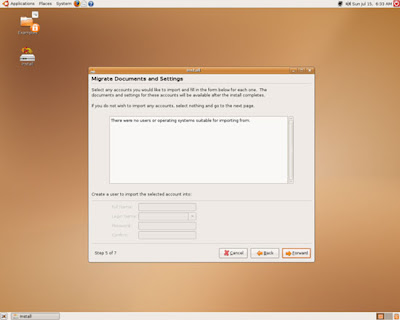
11. The next screen is going to ask you if you want to import any accounts you may have on Windows XP. If you want to do it, if not just proceed.
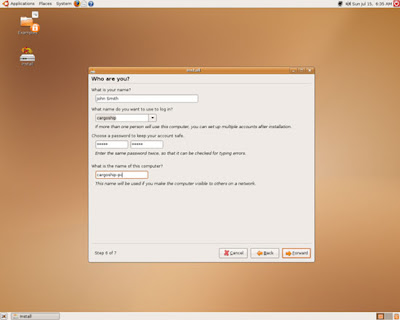
12. Time to enter your personal information. Just as a note: your login has to be all lowercase letters.
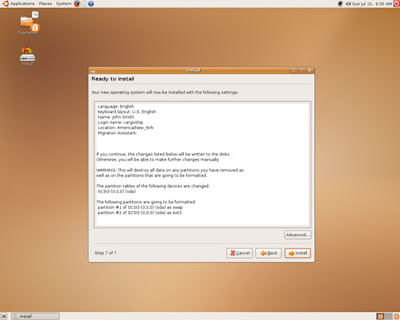
13. Now just confirm all the information and click Install to start enjoying the beauty of Linux!
